
| Grasmoor - Route Two |
| Start - Cinderdale Common NY 162 194 | Distance - 1.7 miles | Ascent - 2,460 feet | Time - 2 hours |
 |
|
A small parking area on Cinderdale Common is the starting point of this walk |
 |
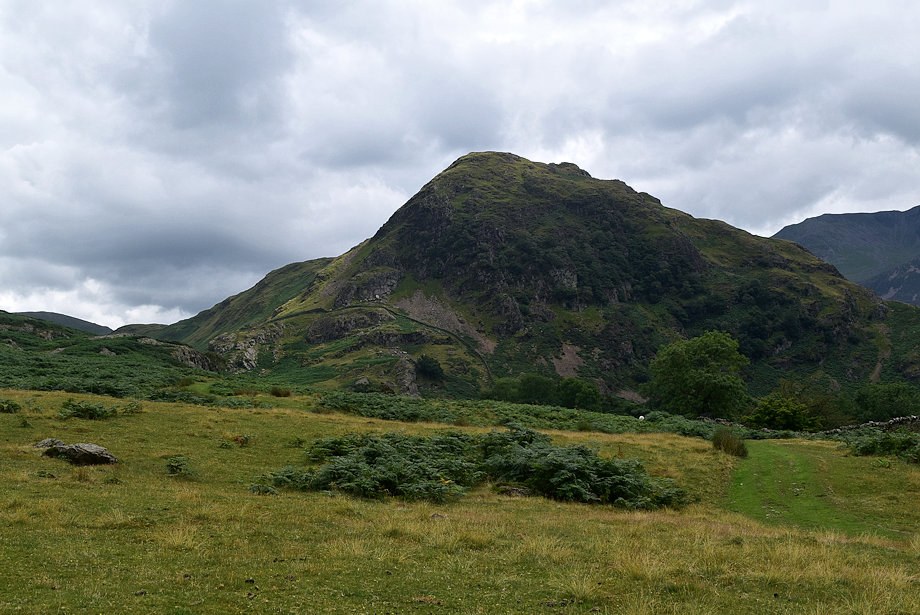
| Grasmoor from Cinderdale Common |
 |
| The ford over Cinderdale Beck which is a short distance to the south of the parking area |
 |
| Lad Hows and Whiteless Pike from Cinderdale Beck |
 |
| Looking over to Rannerdale Knotts from Cinderdale Beck |
 |
| Initially the path follows the course of Cinderdale Beck before turning south-east to climb up to the Lad How ridge |
 |
| Grasmoor from the path alongside Cinderdale Beck |
 |
| One of the Cascades in Cinderdale Beck |
 |
| Past the cascades the path climbs more steeply high above the beck towards a solitary holly tree which is perched on the top of a broken crag |
 |
| Approaching the holly tree |
 |
| Rannerdale Knotts from the holly tree |
 |
| Crummock Water and Loweswater from the holly tree |
 |
| From the tree the path continues high above the valley of Cinderdale Beck to reach the ridge-line of Lad Hows |
 |
| Looking over to Great Gable from the climb to the ridge-line |
 |
| On reaching the ridge-line the path turns towards the south-east and climbs to the summit of Lad Hows |
 |
| Looking back to Crummock Water and Loweswater |
 |
| Looking over to High Stile and Red Pike across Rannerdale Knotts |
 |
| Higher on the climb to Lad Hows |
 |
| Mellbreak across Crummock Water with Loweswater flanked by Burnbank Fell and Low Fell |
 |
| Approaching the summit of Lad Hows |
 |
| The summit of Lad Hows |
 |
| Looking down on Rannerdale from the summit of Lad Hows |
 |
| Red Pike, Starling Dodd, Great Borne and Mellbreak from the summit of Lad Hows |
 |
| Crummock Water and Loweswater from the summit of Lad Hows |
 |
| Whiteless Pike from the summit of Lad Hows |
 |
| The ridge connecting Lad Hows to Grasmoor runs between the deep valleys of Cinderdale Beck on its left and Rannerdale Beck on the right |
 |
| Looking across to Wandope from the connecting ridge |
 |
| The north top of Mellbreak, Blake Fell and Burnbank Fell from the connecting ridge |
 |
| The first section of the ridge is quite level before it begins to steepen and gradually turns to the north |
 |
| The start of the steeper section of the ridge |
 |
| Looking back, the summit of Pillar appears over the ridge between High Crag and High Stile |
 |
| Looking down on Lad Hows |
 |
| The approach to the steepest part of the ridge |
 |
| Gavel Fell and Blake Fell over Mellbreak |
 |
| High Crag, Pillar, High Stile and Red Pike across the slopes of Whiteless Pike |
 |
| The headwall of the Rannerdale Beck valley |
 |
| A clear path through the heather leads up to the steepest part of the ridge |
 |
| Bowfell, Esk Pike, Great End, the Scafells (in cloud) and Kirk Fell over Whiteless Pike's summit ridge |
 |
| The steepest part of of the ridge where the path becomes much rougher as it zig-zags through a long section of scree |
 |
| Looking over to Wandope |
 |
| Looking back to the High Crag ~ Red Pike ridge |
 |
| Sunlight highlights Mellbreak .......... |
 |
| ..........and Whiteless Pike |
 |
| Nearing the end of the scree section |
 |
| Looking down on the valley of Cinderdale Beck |
 |
| Looking back along the route of ascent up from Lad Hows |
 |
| The Helvellyn range appears over the col between Eel Crag and Wandope |
 |
| Mellbreak, Gavel Fell, Blake Fell and Burnbank Fell across the steep southern slopes of Grasmoor |
 |
| The steep section of scree ends as a band of embedded rocks is encountered from where .......... |
 |
| .......... the ridge begins to turn slightly to the west |
 |
| Walkers starting the descent the of the steep section of the ridge |
 |
| Pillar, Scoat Fell and Haycock over the High Crag ~ Red Pike ridge |
 |
| The Helvellyn range and Fairfield group over the summit of Wandope |
 |
| The gradient begins to ease on the approach to the summit ridge |
 |
| Looking over towards Eel Crag |
 |
| Looking down on Lad Hows |
 |
| The Langdale Pikes, Glaramara, Wetherlam, Bowfell, Esk Pike, the Scafells and Pillar on the skyline |
 |
| The summit ridge path leading to Eel Crag comes into view |
 |
| Approaching the summit ridge where the path begins to fade and becomes very indistinct |
 |
| Joining the summit ridge path |
 |
| Looking back from the summit ridge path |
 |
| Looking down to Rannerdale from the summit ridge path |
 |
| The summit of Grasmoor comes into view |
 |
| The summit cairn/windshelter on Grasmoor |
 |
| Buttermere from the summit of Grasmoor |
 |
| The High Stile ridge above Rannerdale Knotts with Pillar, Red Pike, Scoat Fell and Haycock on the skyline from the summit of Grasmoor |
 |
| Mellbreak across Crummock Water with Starling Dodd, Great Borne, Hen Comb, Gavel Fell and Blake Fell in the middle distance |
 |
| Blake Fell and Burnbank Fell from the summit of Grasmoor |
 |
| Low Fell and Fellbarrow from the summit of Grasmoor |
 |
| Whiteside from the summit of Grasmoor |
 |
| Hopegill Head, Grisedale Pike and Skiddaw from the summit of Grasmoor |
 |
| The Helvellyn range from the summit of Grasmoor |
 |
| Robinson from the summit of Grasmoor |
|